Go to Posts > Add New

Bring in or Write Content including Headline (Title)

Prepare the Featured Image
Size the news story Featured Image to 720 x 480. Export from Photoshop or your editing/sizing/cropping software. It’s important to get the image size just right. See details at end of this page.
Insert Featured Image
Use the panel on the bottom right to add the Featured Image.

Choose Category
Choose the category or categories if it fits into multiple.

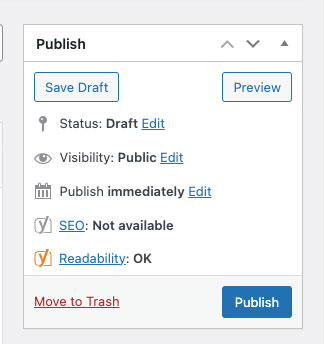
Save Draft / Review / Publish
After completing the content and the featured image, save the page as a Draft and Preview. If all looks Good you may Publich when ready, or simply leave as a Draft until you’re ready to publish. There’s also an option in this area to schedule the article to automatically publish it at a later date.
Note that you can back date an article in this panel as well. Simply choose Edit near the date and choose an earlier date.
How to Manage Images in Photoshop
Use a single Photoshop .psd file for each type of image on the website. For instance the secondary banner images would be a single file such as secondaryBanner.psd which would be the master psd for that image size or type. All new images for export to the website would be pasted into this master file as a new layer. This allows you to keep a history of images used as the specific type as well as ensuring that the output is always sized and cropped correctly.
The goal for image sizing is to output an image that is suitable for quality at the lowest “weight” possible in KB or MB. This will ensure mobile devices and people on slower internet connections have a fast loading website.
Step 1. Open *image*.psd. Note that the screenshot below shows that it’s open at 16.7% of its original size, and that there’s plenty of extra area around the image within the window the file is open on. That extra space will give you room to resize the large image pasted in step 2.

Step 2. Copy the source file for placement on a new layer. Paste into the master .psd. Choose CMD-T (mac) or CNTR-T (win) to get the Transform tool. You’ll see 8 white squares on the image border that allwo you to click and drag the photo to size. Grab a corner and size down. The aspect ratio will stay the same. For a quicker downsizing you can hold the Option/Alt key right after you grab the corner. This helps on layers/images that are much larger than the target size.
Once the photo fits within the area click Enter or simply move to the next task within Photoshop and the transform will hold. Use the Move Tool to move the image around on the layer if necessary so that it will have the crop you want (see second image below). Also note ont eh second image that the “Info” panel is open. This is handy for seeing the size WxH of pasted images when they’re selected. You can turn that panel on under Window in the Photoshop app.


Step 3: Export the image for Web. I use the Save for Web Legacy export but the key is to set the photo to JPEG at around a 60 Quality setting (adjust if necesssary). Note that the example shown below is 3840 x 1200 which is a large banner. The file size is 906k. If this file had more complexity it might break the 1 mega-bit barrier, but typically no image should ever be over 1MB, and most smaller ones should be 50kb – 200kb. The second photo below shows a blog featured image that’s actually reasonably large and it “weighs” 188kb.
Banner Photo

Blog Photo

Notes:
Almost always upload a photo as a jpeg and not a .png. Use .png for graphics or items with a transparent background, such as logo’s or page graphics. See the difference in file size for a banner image saved as a jpg vs png.
