One mistake or deletion of the files on the server can bring the website down, so be careful. I do have daily backups though 🙂
Before starting go ahead and set up a local directory on your computer such as
/GaCoastWebsite/Live/virtual-tours/
Within this directory add a new one for each new tour
1. Download FileZilla if you don’t have it on your computer.
https://filezilla-project.org/
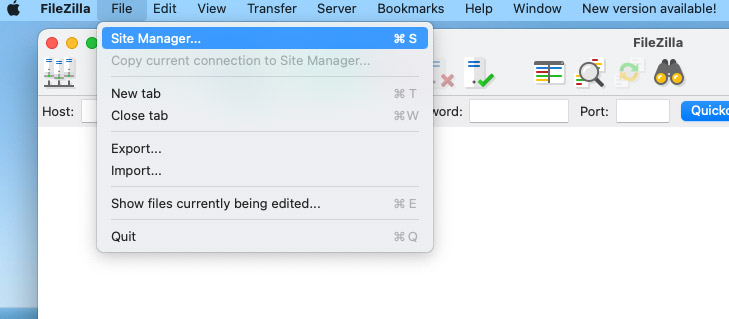
2. Open FileZilla and go to Site Manager. Note that FileZilla often has update pop-ups and I typically ignore them rather than updating each time.
3. In the Site Manager window click New Site if this is the first time you log in. After the first time you’ll see the site name in the left Entry area. Give the site a name for the initial setup. Then use the image below for the other settings. The username and password will be provided to you separately. Keep this in a secure password keeper.
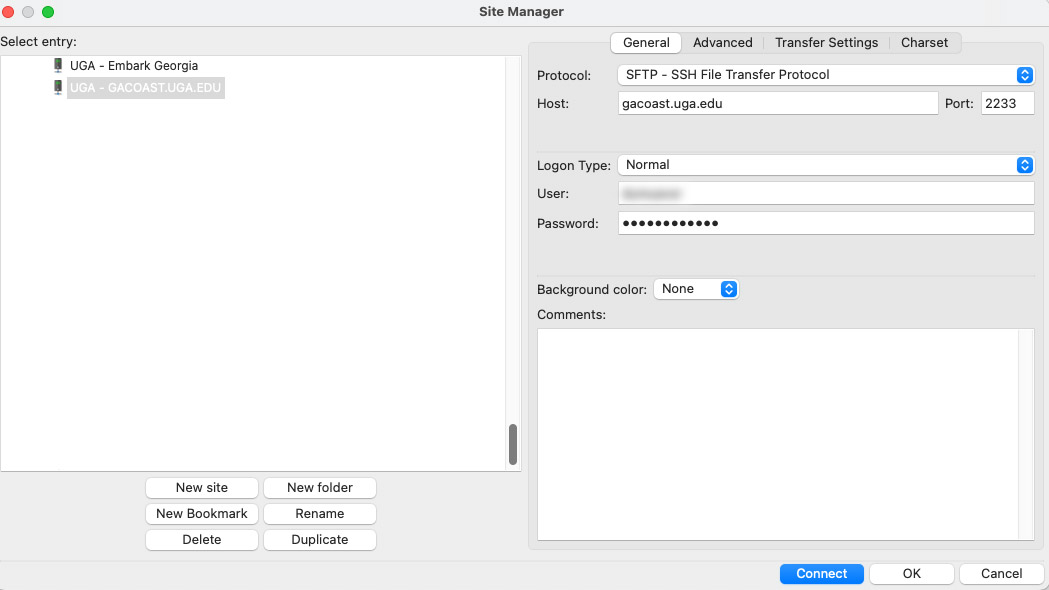
Click Advanced while still in the Site Manager. For Default Local Directory – browse to the directory where you’ll keep the folders for the virtual tours. Each virtual tour should be in its own directory. Default Remote directory should be left blank as it never seems to work. All other settings should be default.
4. Click the Connect button.

5. If login is successful you’ll get an “Unknown Host Key” pop-up. Click the checkbox: Always trust this host and click OK button.

6. Confirm you are in the proper directory in the left middle pane, FileZilla can sometimes present the wrong local directory if you have a number of sites that you manage. If you have a single site you should be fine.

7. In the right pane double click the public_html directory. Screenshot below is just a close-up from the one above.

8. Within the public_html directory in the right pane, you’ll see /virtual-tours/. Double click that and you’ll be able to upload your latest tour. But first, in the left pane make sure you’ve navigated to the /virtual_tours/ directory on your local machine.

9. If you don’t see the new directory on the left pane, or if you make any updates to the contents of that directory you’ll need to do a Refresh.

10. Upload the new directory for the latest tour.

11. After upload confirm it’s in the root folder of /virtual-tours/. It should be in a folder alongside all the other tour folders.

12. Add the tour to the page within the WordPress back end. Edit the directory to reference the new folder, such as /test-tour/ as shown below. Edit the name=”YOUR TOUR NAME” as well for accessibility.
13. Test the tour on the new page using Preview. Make it live when ready. The tour above works as it’s referencing the exact file path on the GA Coast server, so it doesn’t matter that it’s being shown on this docs page.